Friday, September 14, 2012

Tapestries in Garden Party Art Show 3


Because I'm also putting some of my mini-tapestries in the show.  8-]

Sunday, August 5, 2012

Bent Cane Sprang-Tapestry Project

Finally warped up the bent cane sprang loom I made mumble mumble years ago.


I left it off, but I can see why it needs the bar across the bottom (separate from the working bars) to stabilize the loom.  I'm forever pushing the bar down to tighten the warp.  Stabilizing the loom might minimize that (or it might not -- I also need notches in the bars or the loom).

It's incredibly light weight.  I'm used to more heft with a stretcher bar loom, and I guess I've been using gravity to hold my shed taut.  Having to experiment some.


I twined a cord across the bottom to hold a little more tension.

~*~


Coming along nicely.  About ready to break for the tapestry portion.


And here's the middle portion starting to be spread out.  I'm thinking the best way to work the tapestry is to take it off the sprang loom and tack it onto a foam core board.

Getting it started is going to be tricky.  It should be ok after that.

~*~


I've moved the sprang over to a foam core board for tapestry weaving.  Have yet to tack it down with pins.


Just about ready to begin pin weaving.  Now all I need is a cartoon.  ;->

~*~


Cartoon in place.  It's really more of a suggestion than a pattern.  I played around with pastels this afternoon, then took a pic of one I liked and printed it out.


~*~


Learning curve.  Takes a lot of pins to stabilize the sprang so tapestry can be beaten hard enough.  Difficult getting it weft-faced.  Sprang doesn't want to spread far enough.  More bubbling.

~*~


Ok.  I had to unweave what I'd done and start over, with only the top shed.  I've moved the cartoon to the middle.  I'm not sure what I'll do with the bottom shed yet, but I could weave something else on the other side.  Afterall, with sprang, there is no front or back.  I'll have to see.

~*~


 Inching along.


Detail


Messy again.

Detail

~*~


Eyeball is serendipitous, but I'll probably do something like that.


Remembered, belatedly, that it's a good idea to do some sumac stitch at the top and bottom of the tapestry (all the moreso because the sprang needs stabilizing).  So I'm adding it now.  I can scootch  the work down from the top and squeeze the sumac in.

~*~


Sumac stitch at the bottom (and top).


Tucked some more tails.


The other day when I was showing this to Jan, I called it a chimera, meaning a cross between sprang and tapestry, but actually the beast is a bit of a chimera, or at least a generic beast.

So I think I'll call this piece Chimera.

~*~


~*~


A bit of a hiatus, but back at it again.  Working on the grassy area.

Tuesday, July 31, 2012

silk worms

Image from fb.


Pottery for uses other than foods. This young Thai gentleman is spinning silk using traditional methods. The pot below holds a raging fire, the pot above boils the silk cocoons. Both pots were at least 1" thick.

Monday, July 16, 2012

Sprang Tapestry

Designing a sprang-framed tapestry.  Got the idea at the fiber retreat.  What if I started a sprang piece, then when it got to about the middle third, cap it off with skewers and start weaving a tapestry on the remaining "warp" threads.


I would make a sprang piece about 6" wide, so the middle section would be 5" or so high (to allow for tapestry draw in).

I can see how difficult it is to needle weave it on the sprang frame.  If it's too elastic, I can remove it to a more stable card loom or foam core board, depending.  The sprang bits at the top and bottom could be stabilized and left to hang, or be pinned back out of the way.

When it comes to displaying the tapestry, it will hang from a bar at the top of the sprang and one from the bottom.  More if necessary to display the sprang bits.  Have to see how it acts.  Can't have it pulling in the tapestry, but the tapestry might be firm enough to hold the sprang open.

I'll work up a sketch.


And here's a sample cobbled together from a sprang piece and a tapestry:


saber tooth tiger


Saturday, June 9, 2012

Sprang Class Prep.

Sprang Class Prep - Fiber Retreat


Loom warped up for sprang bag from a previous class.  Dowels, skewers, string placeholders, warp, bobbin.


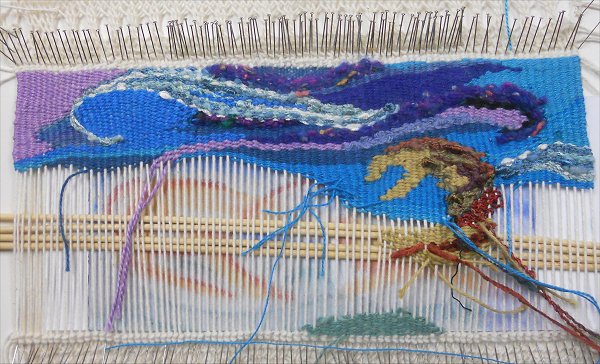
Stretcher bars for the new class:


Warping a 2-color sample on the demo loom:


Each band is 10 loops wide.  13 bands so far.  This is for a cap which will be at least 150 loops, possibly more.


I am tying on the new color at each change.  There are ways to wrap and continue, but I didn't find that workable.  I'll cut and tuck all strings eventually.


But this is a piece to work techniques.  The class project will be simpler.


Students may want to try lacy holes, but they don't work well on tiny bags.  ;->


170 loops, 11" span.


 Detail.


~*~


Class loom warped up with 2 colors, alternating, 10 loops each.


I cut the dowels 12", but 11" will fit better within the frame rim.


Following Blue's videos, there are a number of things you can do with 2 colors this way.
http://www.denblauwenswaen.nl/public/sites/dutch/technieken/sprang.htm

Specific 2-color youtube video:
http://www.youtube.com/watch?v=nlUw9DQbIqw

And I have a couple ideas for myself.  So I'm going to play around with it a bit.


It's easy to tell if the loops are crossed with 2 colors.


Making shapes and changing directions.


More changes on color and direction.


When it gets too tight to work with your fingers, switch to skewers to pick up and hold twists.  Working the center -- leaving in the thread placeholders now to become the bottom and tassels of the bag.


Tapestry needle pulls tassel cords thru the shed.  Move one up and the other one down.


 When done, tie the tassels and pull them tight.


 Add the pull cords to the loops at top and bottom and take the bag off the loom.


Sew up the sides, run the pull cords thru both sets of loops.  Ta-da!  Sprang bag.


I like the 2-color alternating wrap.  Make more 2-color twinings before I go for shapes and directions.


~*~


Another sample bag:


~*~


A shaky and qualified success at plaiting:


I'm pretty sure I've got the hang of the right side (the beginning) but I'm still a little shaky about the left side (the finishing).  Getting there!  8-]

Ok, some notes.  It's all in 1\1.  And you have to shift one thread from the row just finished to the other side before you begin the next row.  There's a need to do that at the other end as well, but I'm still contemplating that move and haven't internalized it yet.

As each pass in only 1 thread to begin (an A), in order to actually cross and not make a big hole you have to move that first thread.  Essentially you're wrapping the first two threads around each other before you begin plaiting.  Clearly you can see that it's working 'cuz the triangles are on the move.