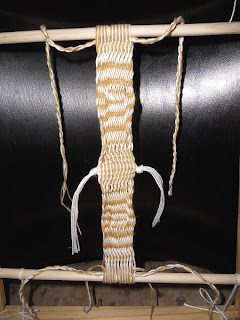
Loom warped up for sprang bag from a previous class. Dowels, skewers, string placeholders, warp, bobbin.
Stretcher bars for the new class:
Warping a 2-color sample on the demo loom:
I am tying on the new color at each change. There are ways to wrap and continue, but I didn't find that workable. I'll cut and tuck all strings eventually.
But this is a piece to work techniques. The class project will be simpler.
Students may want to try lacy holes, but they don't work well on tiny bags. ;->
170 loops, 11" span.
Detail.
~*~
Class loom warped up with 2 colors, alternating, 10 loops each.
I cut the dowels 12", but 11" will fit better within the frame rim.
http://www.denblauwenswaen.nl/public/sites/dutch/technieken/sprang.htm
Specific 2-color youtube video:
http://www.youtube.com/watch?v=nlUw9DQbIqw
And I have a couple ideas for myself. So I'm going to play around with it a bit.
It's easy to tell if the loops are crossed with 2 colors.
Making shapes and changing directions.
More changes on color and direction.
When it gets too tight to work with your fingers, switch to skewers to pick up and hold twists. Working the center -- leaving in the thread placeholders now to become the bottom and tassels of the bag.
Tapestry needle pulls tassel cords thru the shed. Move one up and the other one down.
When done, tie the tassels and pull them tight.
Add the pull cords to the loops at top and bottom and take the bag off the loom.
Sew up the sides, run the pull cords thru both sets of loops. Ta-da! Sprang bag.
I like the 2-color alternating wrap. Make more 2-color twinings before I go for shapes and directions.
~*~
Another sample bag:
~*~
A shaky and qualified success at plaiting:
I'm pretty sure I've got the hang of the right side (the beginning) but I'm still a little shaky about the left side (the finishing). Getting there! 8-]
Ok, some notes. It's all in 1\1. And you have to shift one thread from the row just finished to the other side before you begin the next row. There's a need to do that at the other end as well, but I'm still contemplating that move and haven't internalized it yet.
As each pass in only 1 thread to begin (an A), in order to actually cross and not make a big hole you have to move that first thread. Essentially you're wrapping the first two threads around each other before you begin plaiting. Clearly you can see that it's working 'cuz the triangles are on the move.


